Bass Neons to LED Strips
Most dance game cabinets come with neon tube lighting which flashes on and off during gameplay. While these look nice, if one of your lights breaks it can be difficult to find a replacement. You might also want to give your machine a refreshed look with a new set of lights.
Project Breakdown
Cost: $85
Time: 2 Hours
Skill level: Advanced
What You Need
DC to DC Solid State Relay
High Density WS2812B LED Strips x2
5V Power Supply
WS2812B LED Controller
22-14 AWG Wire Nuts
3 Pin JST Extension Cord
Spade Terminals
Crimping tool
Wire Strippers
Multimeter
LED Light Panel Sheet (optional for light diffusion)
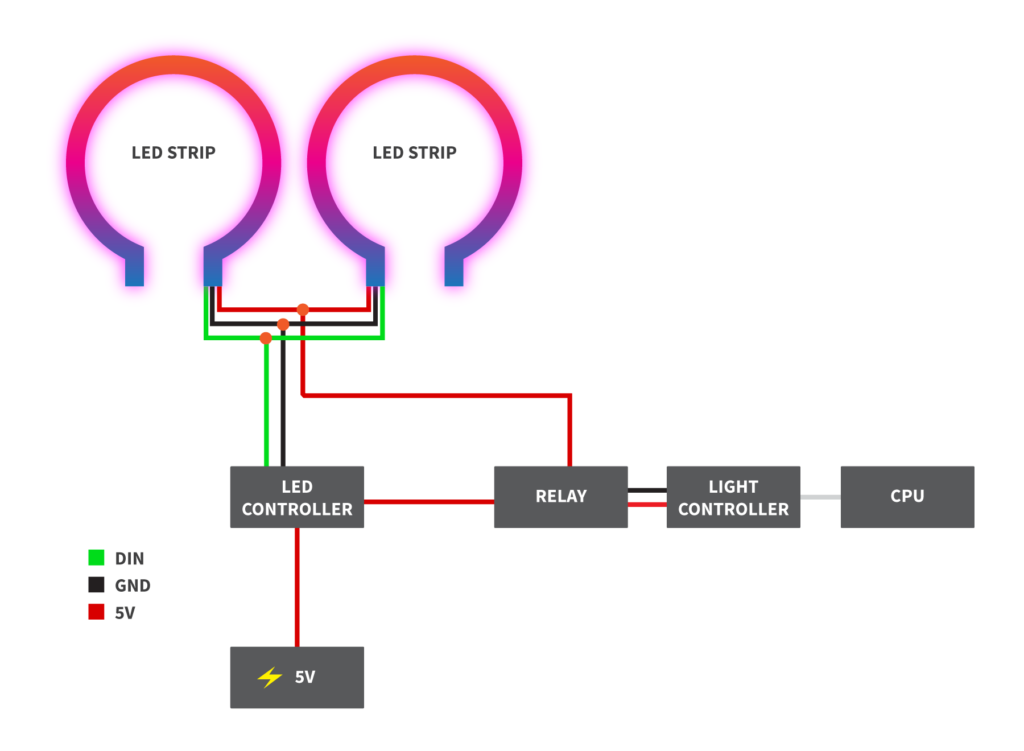
Here’s how you’ll be setting up this project. Use this wiring diagram as a reference throughout this tutorial.
Step 0: Removing the existing neons
Depending on the model of your arcade cabinet, the neon transformer you’ll be disconnecting is 120-220v. Big fat disclaimer: dealing with this level of voltage is dangerous. Don’t be put off, however make sure to be extra careful when dealing with the removal of electronics.
Power down your cabinet and unplug it from the wall. There are four pieces you’ll be removing:
- Neon lamps (x2)
- Neon transformer
- Solid state relay
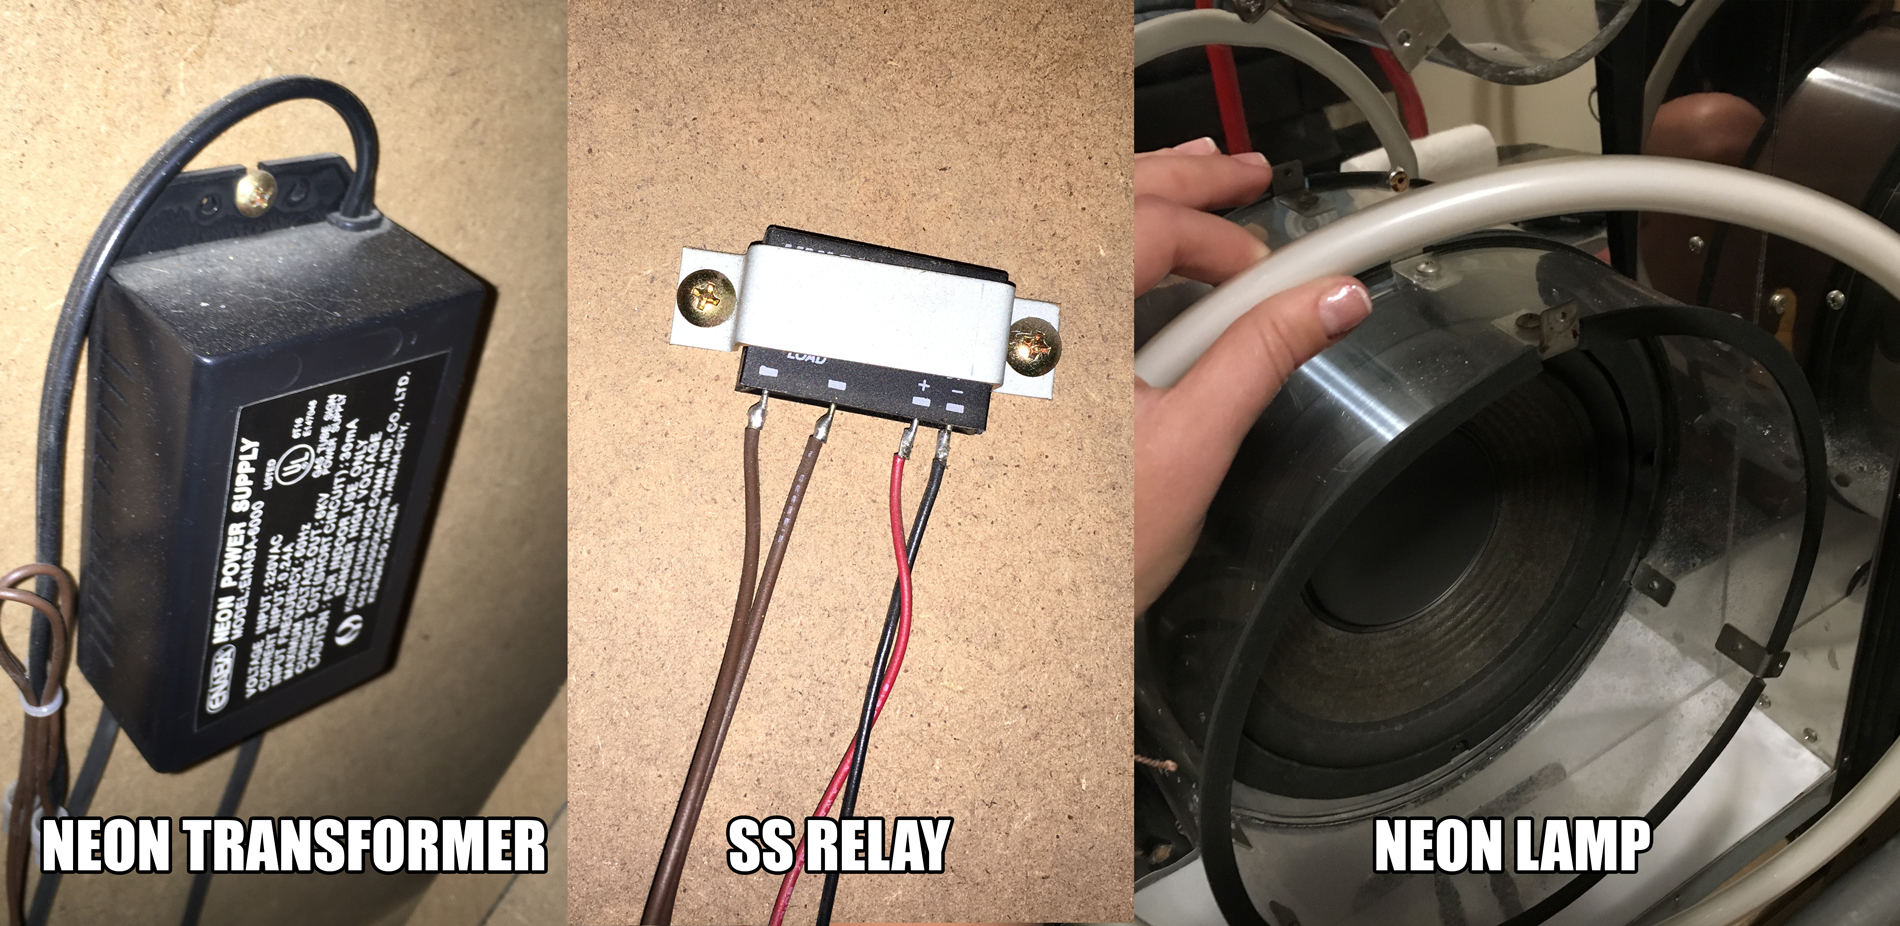
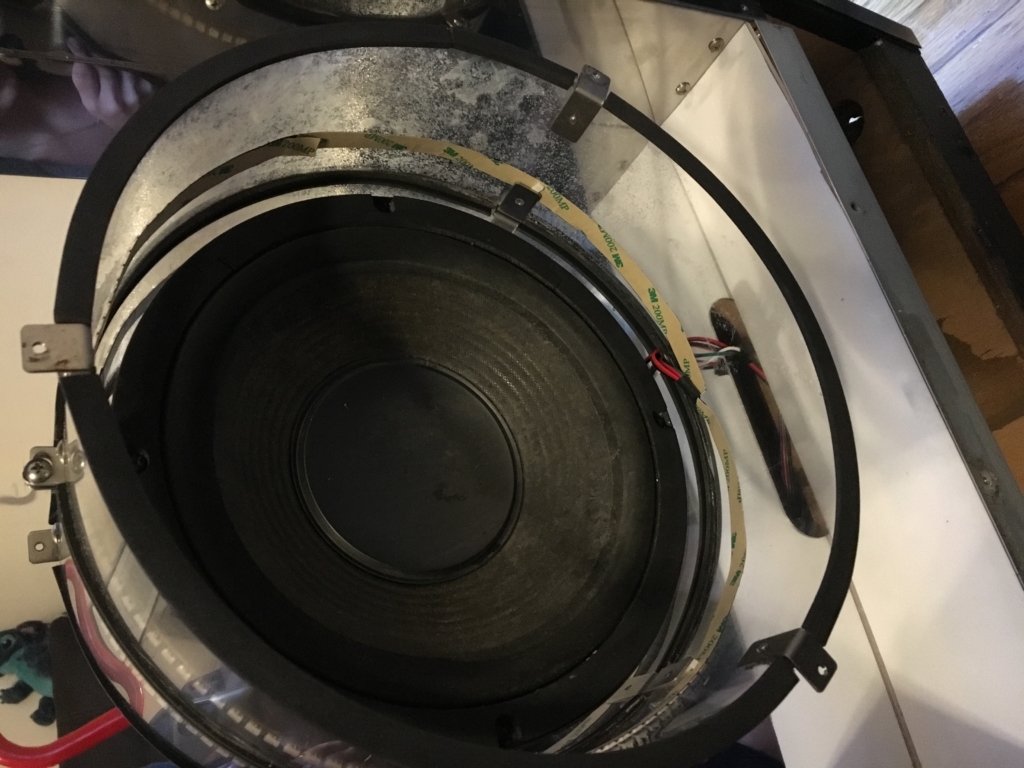
First, remove both the neon lamps by unscrewing the bass plate covers and unplugging the lamps. At the bottom of the subwoofer you’ll find two clamps. Detach the clamp and carefully remove the lights from the machine. These are delicate so be gentle.
Second, remove the neon transformer. Again, make sure your machine is powered off and unplugged. Depending on your machine you may have to unclamp or plain cut the wires to the transformer. Unscrew it from the machine to remove. Use your multimeter to check there’s no power to the wires. Note: You won’t be using this transformer or the power it’s connected to, but do disconnect it. If it remains plugged in with the cabinet on it will start to burn without the neon lamps to discharge power to.
Third, unscrew the relay from the machine. Cut the wires going into the relay and strip them again with wire strippers.
Set the components in a safe place to discard or sell later.
Step 1: Cut the LED strips
Take your two packages of LED strips and measure the length you want to cut. I wrapped mine on the inside of the subwoofer plastic, though you may choose to wrap on the outside.
After measuring, cut the end without the connector. You want to preserve the connector for later.
Set the LED strips aside for now.
Step 2: Cut the LED controller
Your LED controller comes with a JST connector on the end of it. Cut this connector off and strip the ends of the wires. You’ll be using wire nuts to connect these to new wires later.
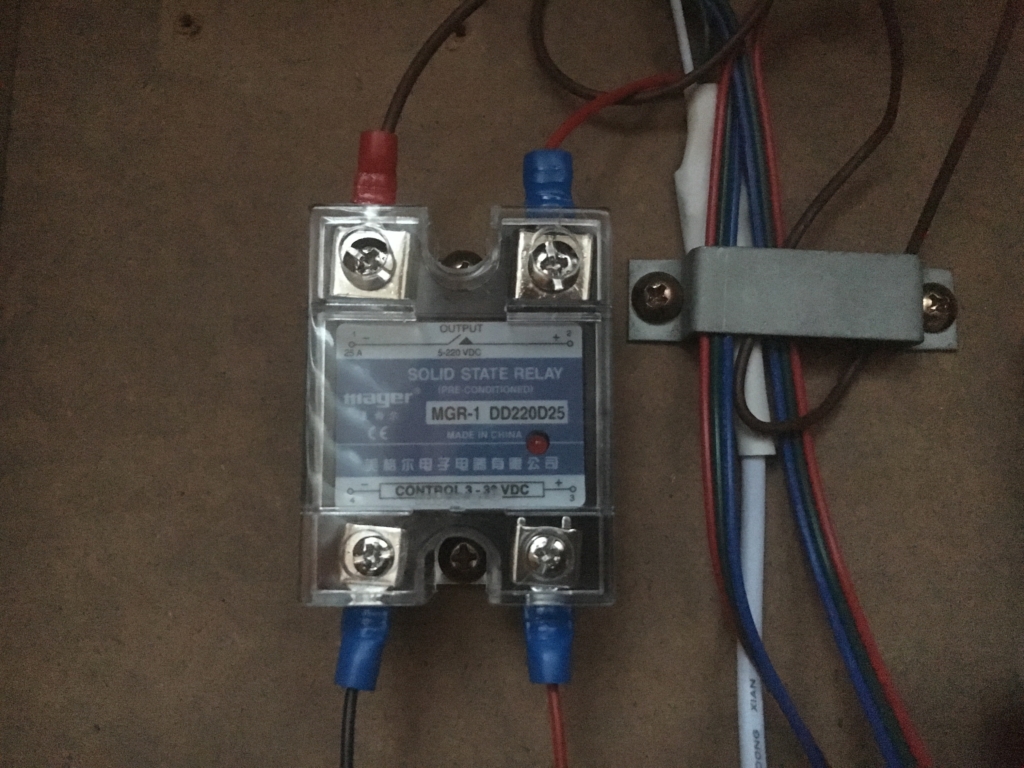
Step 3: Wire and mount the relay
This is where it starts to get tricky, so make sure to pay close attention to your wiring.
The relay is what turns your lights off and on. A signal gets sent from your lights controller (Minimaid, LumenAR, even a 573, etc.) which tells the relay to send an electric signal to turn the LEDs on or off. There are two sets of wires to connect to the relay; two wires coming from your lights controller and two which close the connection to the lights.
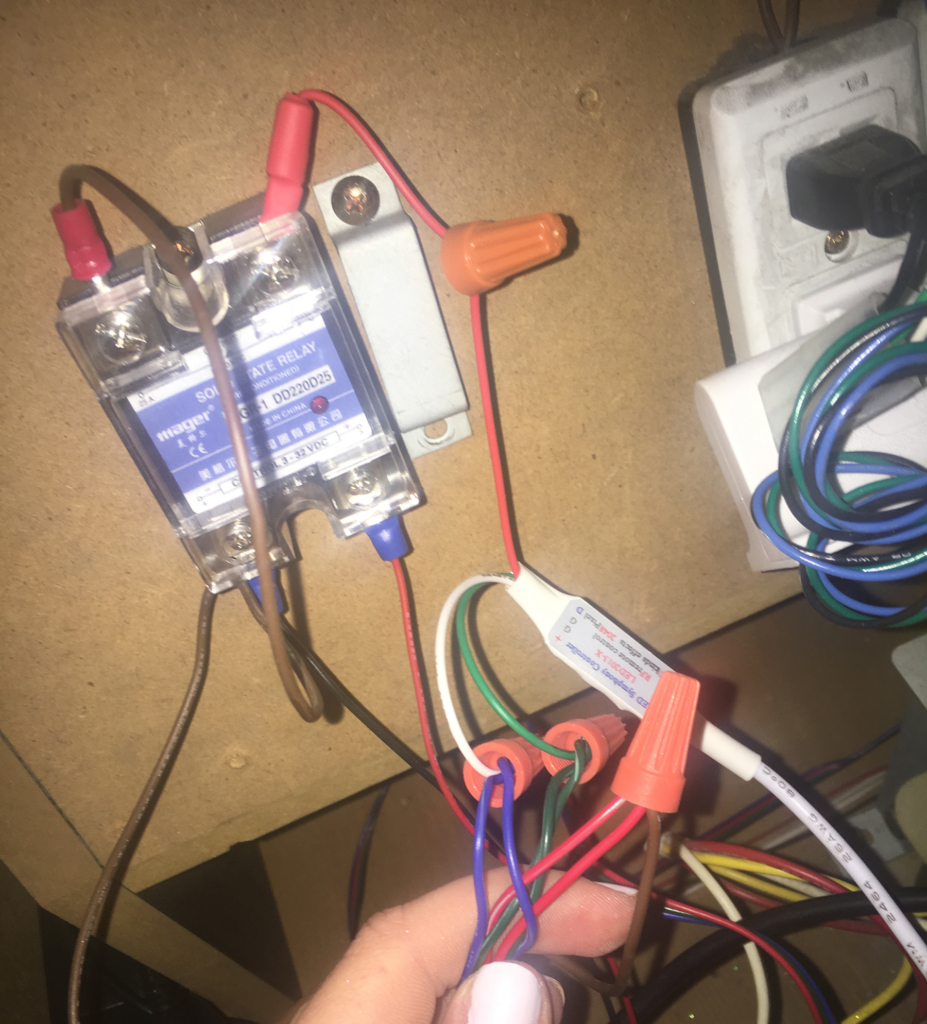
Strip each wire and connect a spade terminal (using your cimping tool) to secure it to the relay.
First, connect the red and black wires coming from your lights controller. The red connects to the “+” input, and the black to the “-” input.
Next, connect the red voltage wire from the LED controller to the “+” output. Then connect a wire from the “-” output and leave it open for now; we’ll be connecting this directly to the LED strips. (I recycled one of the brown wires from the neon setup).
Step 4: Connect the LEDs
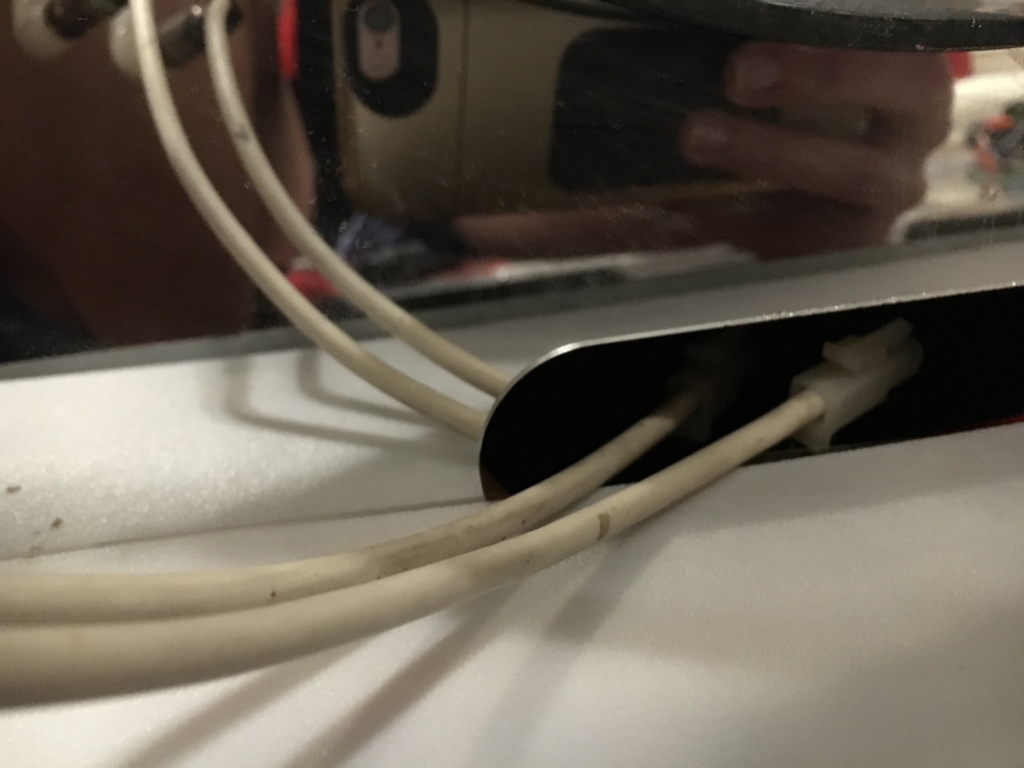
First, take your JST extension cable and plug it into the LED strip for the one player side of the cabinet. This should be the strip which is farthest away from the relay. Push the LED strip through the opening in the subwoofers to mount later.
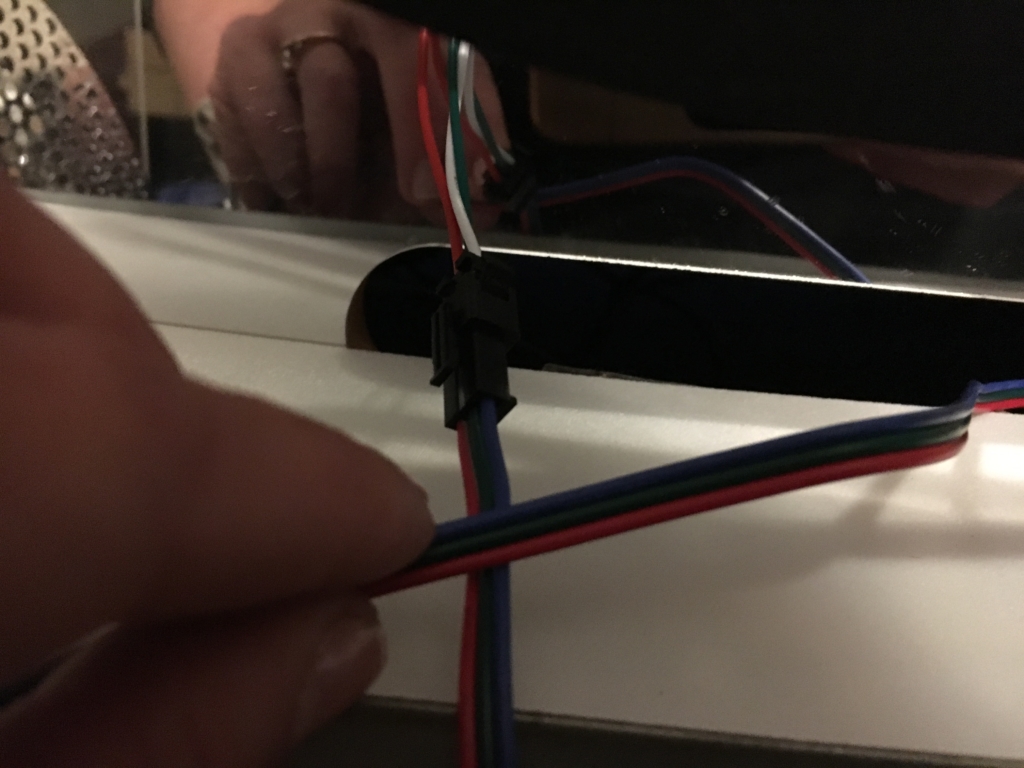
Pull the LED strip through the 1P side of the cabinet.
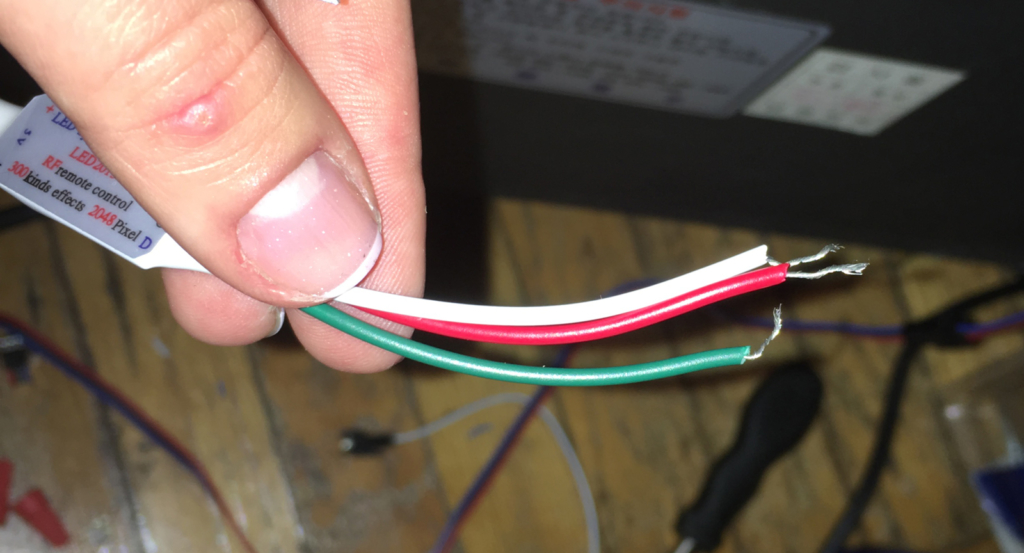
Second, cut the JST connectors off the end of the extension cable and the two player side LED strip. Strip the ends of the wires with your wire cutters.
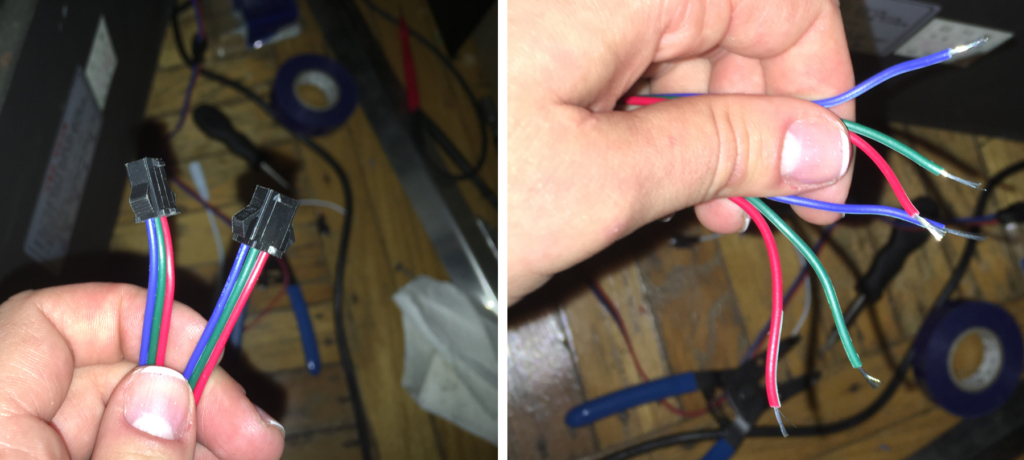
Cut off the connectors
Third, group the wires to connect with the wire nuts:
- Group 1: Three cables. Two red cables from the LED strips and one brown (or whatever color you used) cable from the relay
- Group 2: Three cables. Two green cables from the LED strips and one green cable from the LED controller
- Group 3: Three cables. Two black (or blue) cables from the LED strips and one white (or blue) cable from the LED controller
Connect each group together with wire nuts. You should have something that looks like this. Note: I have an extra wire nut to lengthen the volatge cable from the LED controller in my picture.
Step 5: Connect to power
Grab your 5v power supply and plug it into the LED controller. This power supply needs to be connected to a constant source (ie, a wall) otherwise it won’t retain the colors you set for the controller.
Disclaimer: Double check you have the right power voltage. If your LEDs are 5v, you need a 5v power supply. If they’re 12v, you need a 12v power supply. If you connect a 12v supply to 5v LEDs, you will ruin your LED strips and your controller. I have done this. Don’t be me.
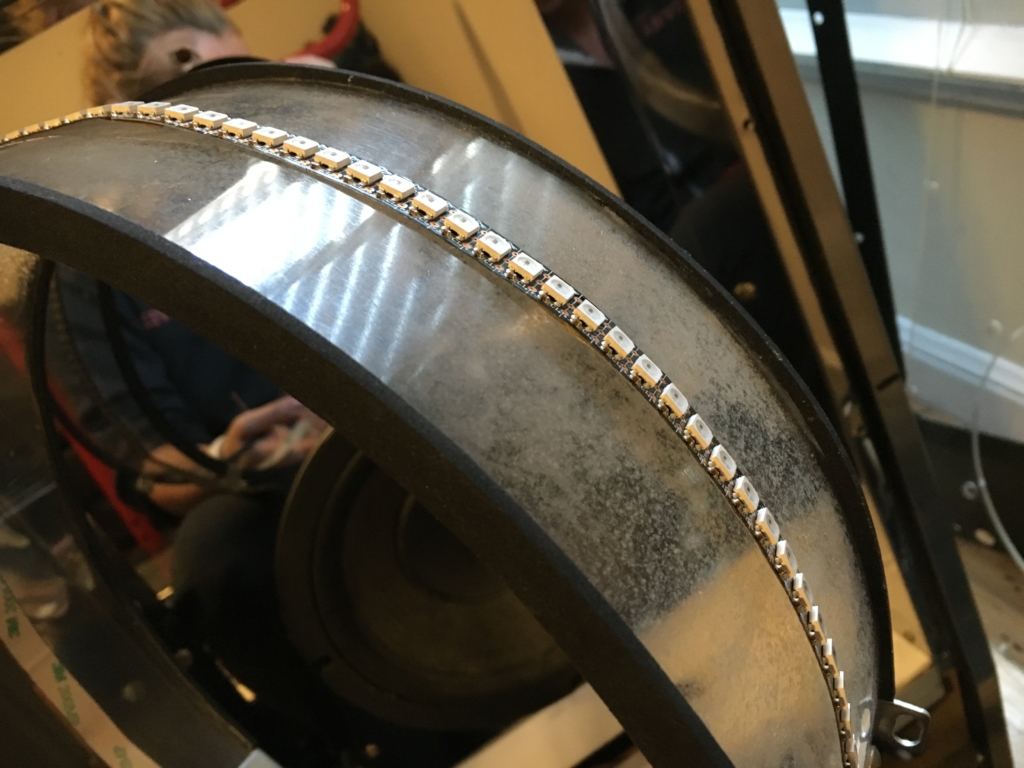
Step 6: Mount the LED strips
I chose to mount my strips to the inside of the subwoofer ring and secured with LED fasteners. You can do this, or wrap your LEDs on the outside of the ring.
Cut a piece of the light diffusion plastic and use tape to secure it around the light.
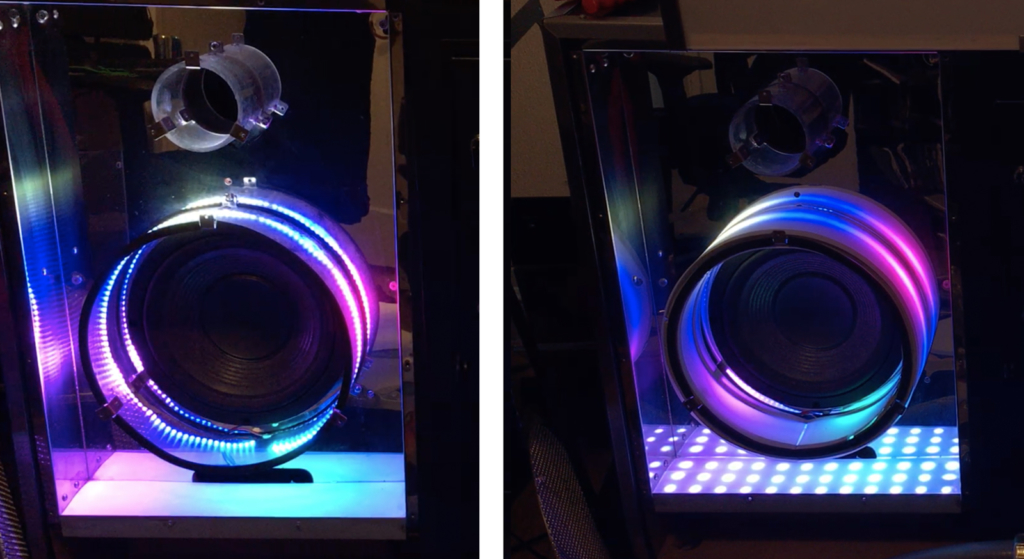
Before and after using the light sheet for diffusion
Step 7: Turn on the cabinet and play!
Using the remote which came with the LED controller you can set the lights to any color combination you like. Play a few songs to see the lights in action!
Something to be aware of: I noticed some erratic flickering with the lights when using certain light combinations. This flickering is reduced if you choose a pattern which uses similar colors along the strip; for example a blue to purple gradient will give you less flickering than white to red. Flickering should barely be noticable to begin with, but if you run into it try playing around with the colors.
0