Replacing DDR Bars with Pump it Up Bars
If you’re an In The Groove or Pump It Up player, stock DDR bars are going to feel a little… lacking. DDR bars are shorter and narrower than ITG/PIU, and if you prefer height and width you can swap out your factory bars for something new.
It’s unlikely you’ll find a set of bars from an ITG cabinet as they’re no longer in production, but PIU bars are the next best thing.
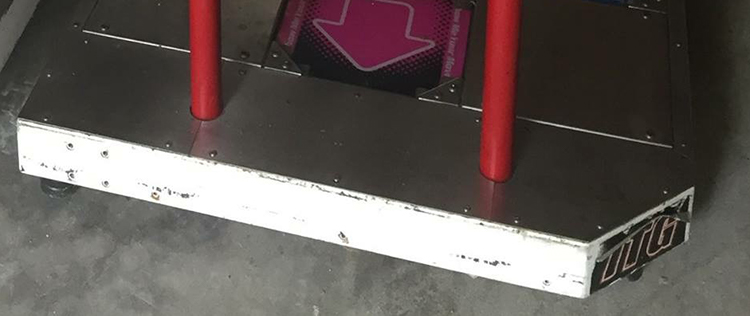
Note: Before you start, be aware the metal plates which come with the pads will not fit afterwards. The spacing between the bars is the same, however the PIU bars sit about .5″ back from the original DDR bar location. This tutorial will cover how to make new plates, or you can leave the empty hole if you’re loose on aesthetics.
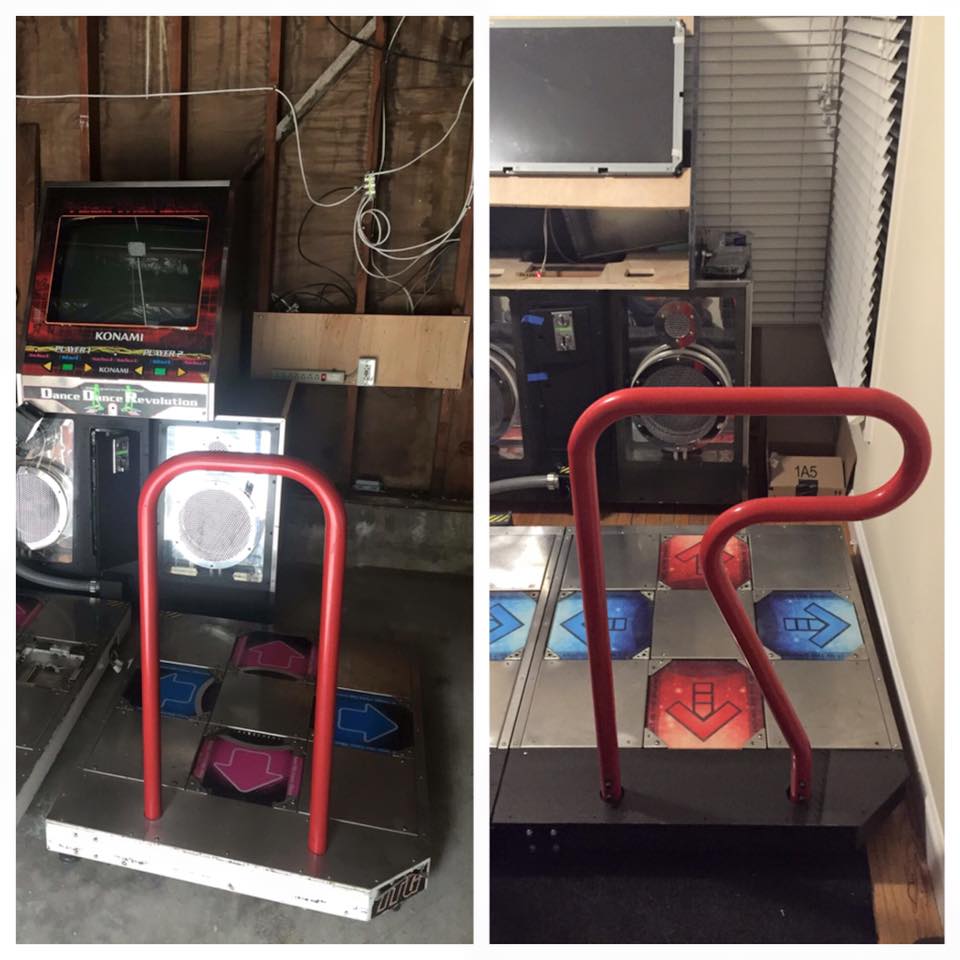
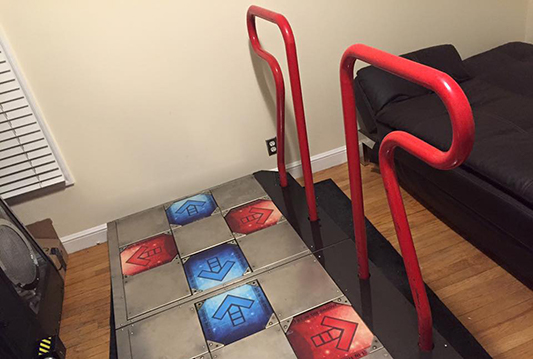
Before and after.
Project Breakdown
Cost: $300-500+
Time: 4 hours
Skill level: Medium
What You Need
A set of Pump It Up bars
Phillips head screwdriver
Torque wrench with M8/M10 sockets
48+ 1/2 in. x 1-1/2 in washers
8x 3/8″ washers
8x M8 x 10mm Bolts (to connect the bar to the joint)
16-20x M10 x 20mm Hex Bolts (to connect the joint to the pads)
M3 x 8mm screw (to replace any damaged screws for the panel enclosure)
Buying Pump It Up bars
Buying New
You do have the option of buying new bars, though this option is fairly expensive. Arcade Spare Parts sells both pieces needed:
The joint bracket is needed to secure the bars to the pads. Some models of PIU bars come in a single piece, though multi-piece is the only option I’ve seen for buying new.
If one or both of the above items is out of stock you can e-mail ASP and they can contact their Andamiro distributor for availability. As of this writing (March 20, 2016) I received a quote from ASP for $614.00, including shipping to the USA.
Buying Used
The next option is to look for a used set of bars to use on your machine. See Where to Buy for advice on where to look for these second hand.
It’s unlikely you’ll find someone selling just the bars on their own. I found my bars through a seller on Craigslist who was selling a set of pads from a PIU machine. I asked if I could just take the bars and joint brackets and got a set in good condition for $300.
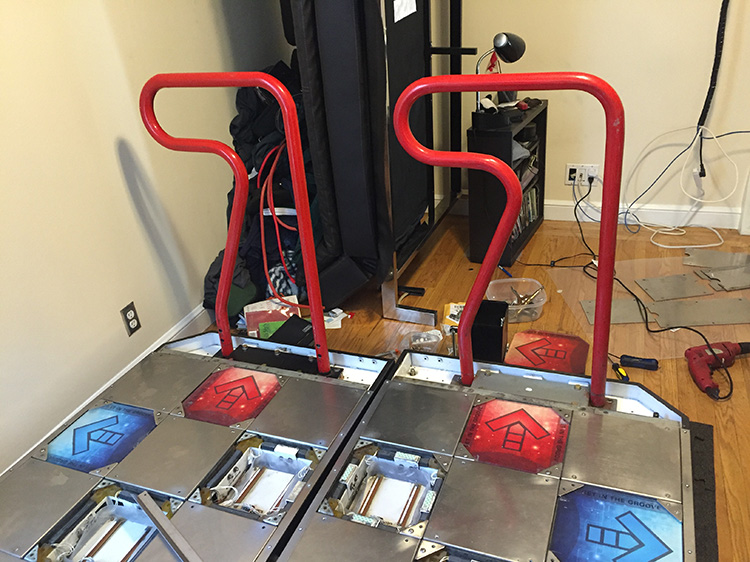
Step 1: Remove the DDR bars
First, remove the metal plates on the pads surrounding the DDR bars. These can be removed by unscrewing the M3 screws with your screwdriver along the edges of the plates. If you run into any issues with the screws, see removing screws for help.
Next, remove the DDR bars with the torque wrench and M10 socket. Set these aside since you’re done with them.
Note: It is possible to repurpose the DDR bars by slicing the base and welding the PIU bars to the pipes. If you’re handy and have access to the tools, you can try this method in lieu of using a joint bracket.
Step 2: Installing the joint bracket
Grab your joint bracket and place it where the DDR bar used to sit. The direction shouldn’t matter, however double check the holes align with the same side as the PIU bar. Some bars/joints come single or double sided.
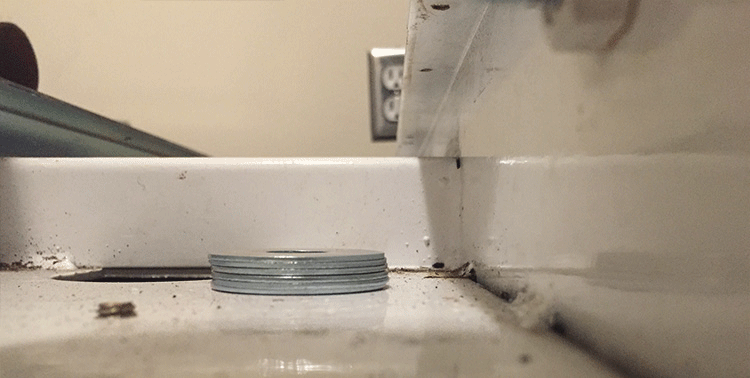
There is a gap between the base of the joint and the bottom of the pad. This is compensated for by using a stack of washers.
Grab a stack of washers and align with the threaded holes for the bolt. I used six to get a solid fill for the gap. Before screwing the bolts, check to make sure you have a solid base. You don’t want to raise these too high as it will add a gap for the bolts on the platform of the joint.
Screw in the M10 bolt with your torque wrench. Repeat this for each hole on the base of the joint bracket.
Depending on the model of your bracket there will be 4-6 holes on the platform. These should align with the holes in the base of the pad. Screw in the M10 bolts to secure the platform.
Step 3: Attaching the bars
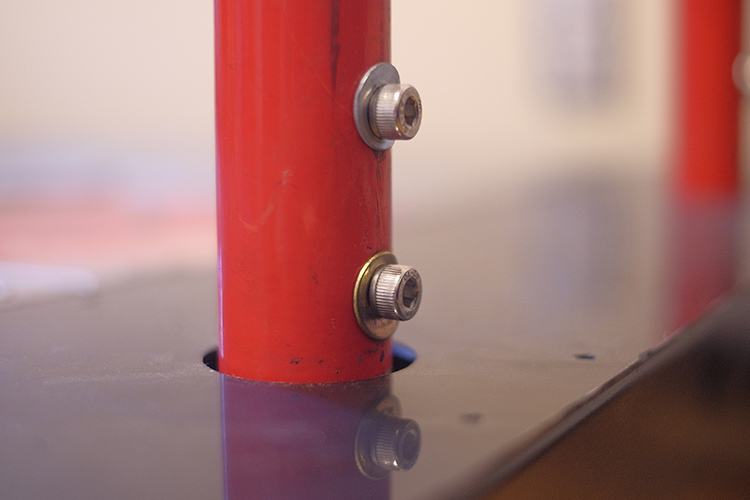
Once the joint brackets are secure, mount the bars to the posts.
Use your M8 screws with the smaller washers and tighten with a hex key.
Protip: Don’t attach your bars backwards. Oops.
Step 4: Making new plates
This is the part that gets a bit tricky. The plates previously used to cover the bar base will no longer fit with the PIU bars, as the new bars sit about .5″ back from the original position.
As this isn’t an essential part, you can choose to omit this step. Or you can make a new replacement plate. This tutorial won’t cover the construction of said plates (yet), though you can use the information provided to manufacture your own.
Plate material
Your best bet for replacing the plate is by cutting stainless steel (or similar metal). These plates get stepped on a surprising amount and will crack due to the hollow base below if the plate material isn’t strong enough.
For the sake of full disclosure, my pads are using acrylic as a stopgap replacement until I replace them with steel. I would not recommend using this material. It’s far too thin and is prone to cracking and breaking.
Plate sizing
Here’s are the dimensions for new plates taking into account the shift for the PIU bars. The outside boundaries are the same as DDR plates, though the holes are offset about .5″.
While the DDR plates come in three pieces, this isn’t essential as the PIU bars separate at the joint and fit right over the pipe. You can choose to cut these into sections if you prefer.
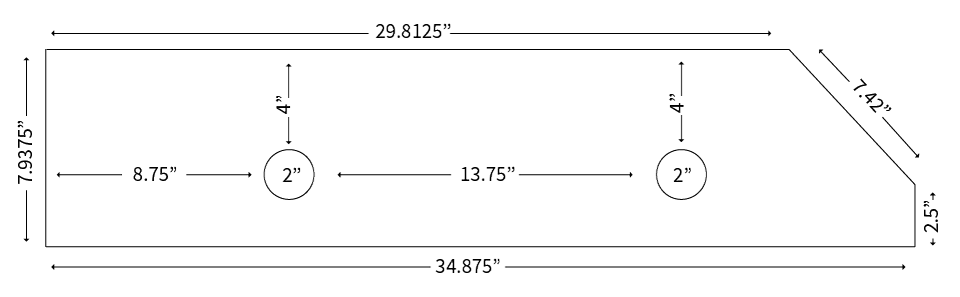
Measurements for a new bar plate.
Step 5: Mounting plates
Once you have your plates built, remove the PIU bars (if you’ve already attached them) and add your new plate. Replace the PIU bars and you’re done!
0