USB Polling
Update 1
I’ve received a report that this method will not work if you’re using GHETT.io or BARR.io to connect your pads. Polling these devices can lead to issues connecting your hardware.
Update 2
If you’re using Windows 10, use Sweetlow’s version of hidusbf instead of those in the downloads section of this article. These include signed drivers for Windows 10.
_____
If you have a DDR cabinet (running OpenITG or otherwise) using a JPAC to connect to a PC, without modification you’ll run into lag issues. Some people complain about having timing issues using a JPAC and chances are the USBs haven’t been polled to increase the response time between the JPAC and the PC.
Here’s what’s going on. PCs come with their USBs polled at a standard of 125hz. This means the signal from the JPAC is updated every 8ms. This also gives you dreaded variable lag, since if you hit an arrow at any point within that 8ms window the registration is delayed until the next call. There’s no other way to adjust the sync since it varies, and overall you’re gonna have a bad time.

I’m on to you, pad excellent.
For normal everyday computing this isn’t big deal. For accuracy-sensitive games like DDR or In The Groove, it’s a pretty huge deal. To correct the input lag, you can increase the input response time by adjusting the poll rate on the JPAC.
This guide will show you how to increase the poll rate on Windows 7. I haven’t tested this on other versions of Windows, but the steps should be similar.
Project Breakdown
Cost: $0
Time: 20 minutes
Skill level: Medium
Downloads
Driver Signature Enforcement Overrider 1.3b
hidusb.zip
Before getting started, make sure your JPAC is connected to the PC and functional.
Step 1
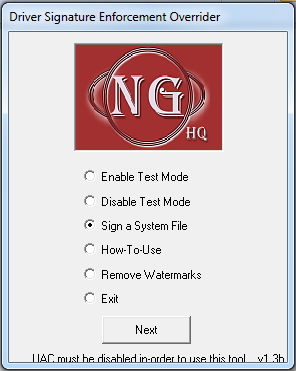
Run Driver Signature Enforcement Overrider. You’ll receive a message asking to confirm if you want to run the software. Select Yes. Windows 7+ is pretty strict with their restricted driver signature enforcement feature and this will allow you to install HIDUSBF to change the poll rate.
Select “Enable Test Mode” and click Next.
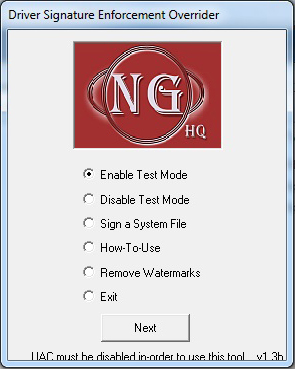
You should see the following screen.
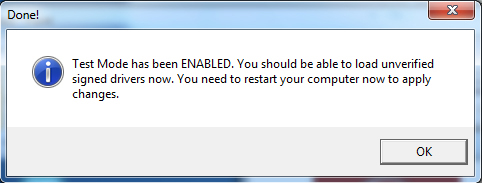
Select “Exit” and click Next. You don’t need to restart yet.
Step 2
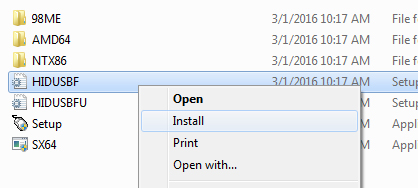
Find HIDUSBF.INF in hidusbf\DRIVER. Right-click and select “Install”. Click yes when the security message pops up. This should install into C:\Windows\System32\Drivers\HIDUSBF.sys.
Step 3
Run setup.exe in hidusbf\DRIVER. You’ll see the following screen.
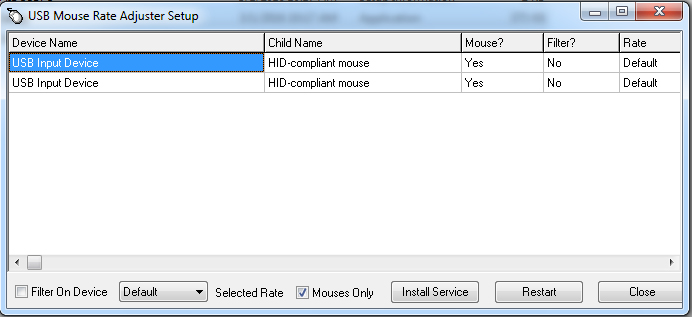
Deselect “Mouses Only” to see a full list of USB devices. Look for “HID-compliant game controller”; this is your JPAC. Select “Filter on Device” and change the dropdown which says “Default” to “1000”. This will increase the USB poll rate from 125hz to 1000hz.
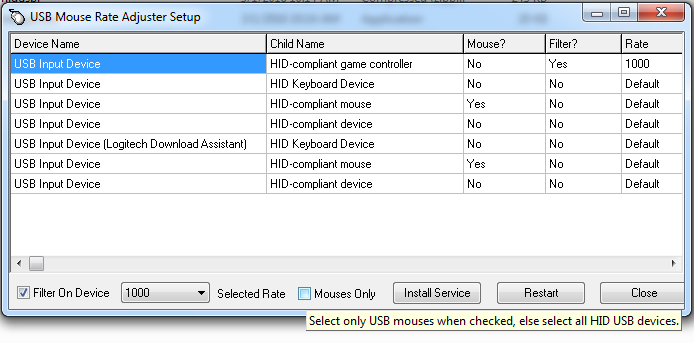
Click “Install Service”.
Step 4
Run Driver Signature Enforcement Overrider again. This time select “Sign a System File”.
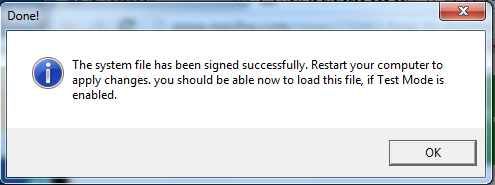
Enter “C:\Windows\System32\Drivers\HIDUSBF.sys”. If your install location was different in Step 2, enter the path HIDUSBF.sys was installed to.

Click OK. You should receive a confirmation message the file has been signed.
Step 5 (Optional)
Driver Signature Enforcement Overrider leaves a watermark in the corner of the desktop. Personally, I like having the watermark since it’s confirmation the service is running. If you want to remove this, run Driver Signature Enforcement Overrider and select “Remove Watermarks”.
Step 6
Restart your computer, you’re done!
Unfortunately I haven’t been able to find any software which can verify the polling rate. There’s plenty which work with mice, but with other devices you kinda just have to trust it’s working.
That being said, the difference was night and day when I installed this on my OpenITG machine. I went from getting 10-20 Excellents on 9’s/10’s to SDE’s and quadstars. Launch oITG/SM and give it a try — hopefully you’ll be pleasantly surprised with the accuracy.
0